First Launch
This guide walks you through connecting a radar, flashing firmware, and running your first live flow.
1. Set Up Your Network
The radar communicates over Ethernet. Your computer needs a static IP on the same subnet as the radar (192.168.2.202).
Configure your Ethernet adapter with:
- IP Address:
192.168.2.200 - Subnet Mask:
255.255.255.0
- Open System Settings and go to Network.
- Select your Ethernet adapter from the sidebar.
- Click Details.
- Under TCP/IP, set Configure IPv4 to Manually.
- Enter IP Address
192.168.2.200and Subnet Mask255.255.255.0. - Click OK, then Apply.
- Open Control Panel and go to Network and Sharing Center.
- Click Change adapter settings in the sidebar.
- Right-click your Ethernet adapter and select Properties.
- Select Internet Protocol Version 4 (TCP/IPv4) and click Properties.
- Choose Use the following IP address.
- Enter IP Address
192.168.2.200and Subnet Mask255.255.255.0. - Click OK to close both dialogs.
Tip
Verify the connection by pinging the radar after it is powered on:
ping 192.168.2.202
2. Register and Log In
Open Radar Flow Studio. On first launch you will be asked to register with your email address. Complete registration and log in.
3. Open an AKM5818 Config
- Click Open Flow.
- Select one of the
akm5818configs, such asakm5818_hil_range_doppler. - Click Open Config.
Note
HIL means the flow uses live radar hardware. SIL means it uses recorded or replayed data.
4. Edit the AKM5818 Node
- Zoom in on the AKM5818 source node in the flow canvas.
- Click the edit node button in the top-right corner of the node.
This opens the parameter editor where you can configure the radar and access firmware tools.
5. Flash Firmware (First Time Only)
Warning
This is a one-time step for new boards. If your radar has already been flashed, skip to Launch and Start.
What You Need
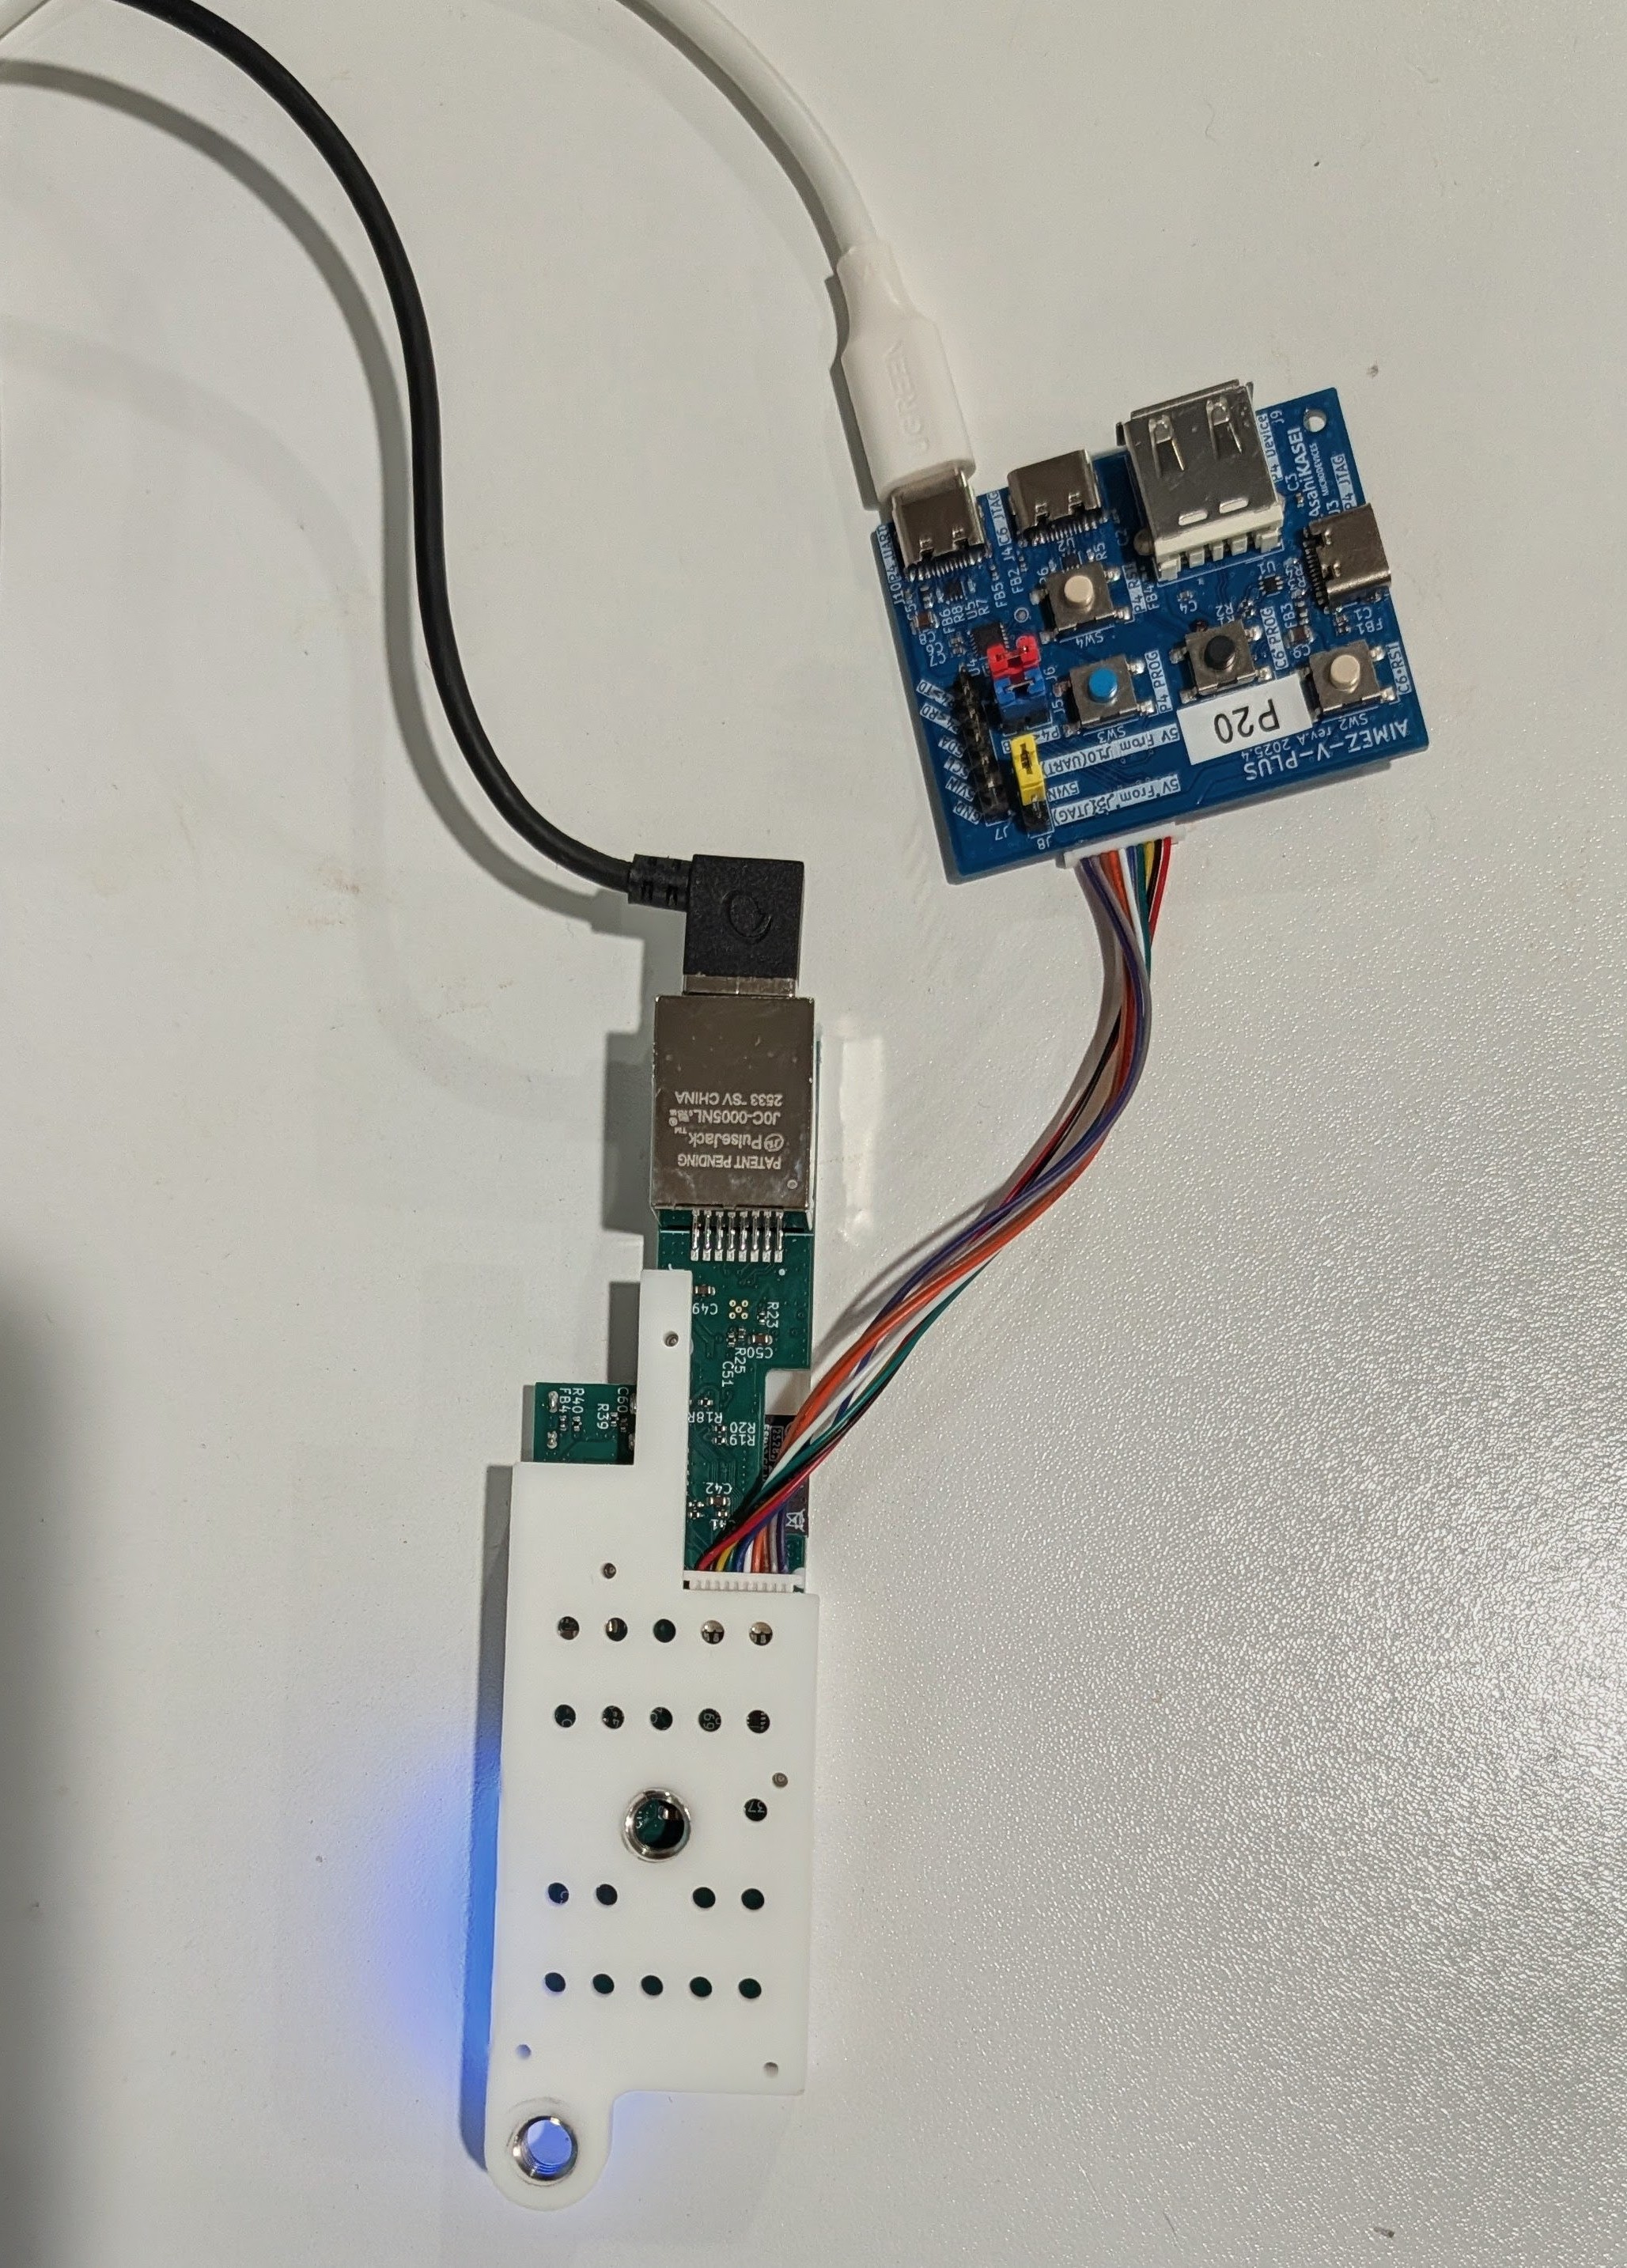
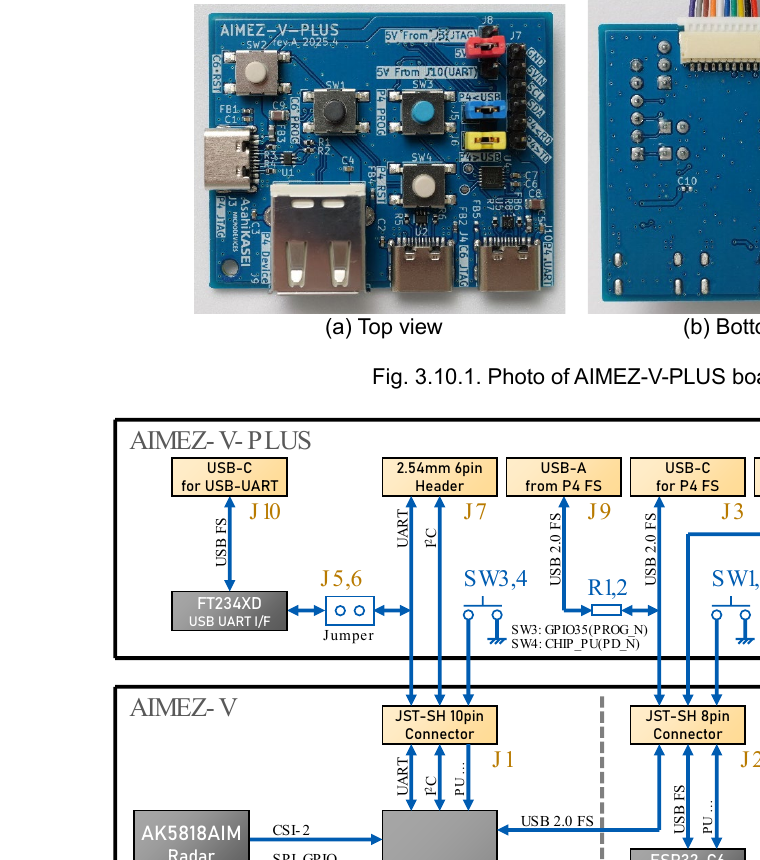
- The AIMEZ-V-PLUS programmer board, connected to the AIMEZ-V radar board via the JST cables.
- A USB cable from the
P4_UARTport on the AIMEZ-V-PLUS to your computer.
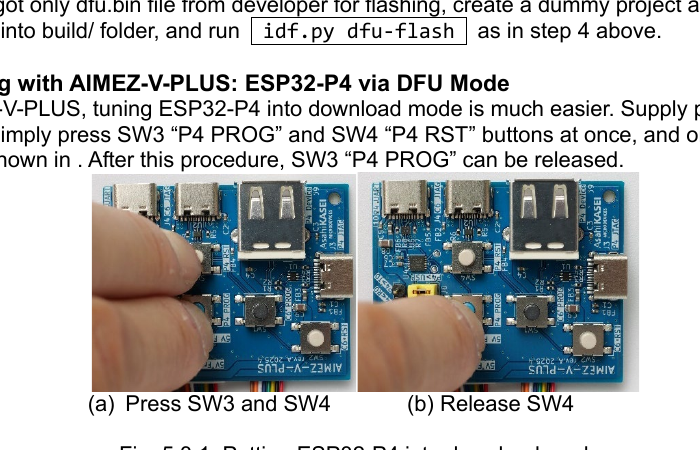
Put the Board Into Download Mode
- Press and hold both SW3 (
P4 PROG) and SW4 (P4 RST) at the same time. - Release SW4 (
P4 RST) first. - Then release SW3 (
P4 PROG).
Flash the Firmware
- In the parameter editor, click Flash Firmware.
- Leave the bundled firmware selected.
- Click Scan if the serial port list is empty.
- Select the USB port that appears for the board.
- Click Write Program.
- Wait for programming to complete, then click Done.
Reset the Radar
Press SW4 (P4 RST) on the AIMEZ-V-PLUS to reset the board, or power-cycle it. The app will automatically retry live detection.
6. Launch and Start the Flow
- Click Launch in the bottom control bar. This prepares the system and connects to the radar.
- Wait for the status to show IDLE.
- Click Start. Data begins flowing and the status moves toward OPERATING.
- Click Display to see the live radar output.